Implementing Custom Writables in Hadoop – BigramCount

Hello everyone,

Apologies for the delay in coming up with this post. I was caught up with my studies. Anyways, today we are going to see how to implement a custom Writable in Hadoop. But before we get into that, let us understand some basics and get the motivation behind implementing a custom Writable.

We will discuss the following in this post:

  1. What is a Writable in Hadoop?
  2. Why does Hadoop use Writable(s)?
  3. Limitation of primitive Hadoop Writable classes
  4. Custom Writable
  5. BigramCount Example
    • Code the custom Writable class
    • Code the Mapper class
    • Code the Reducer class
    • Code the Driver class
  6. Setup the input directory in HDFS
  7. Run the job

What is a Writable in Hadoop?

If you have gone through the “Hello World” of MapReduce post, or any other Hadoop program, you must have seen data types different from regular Java defined data types. In wordCount post, you must have seen LongWritable, IntWrtitable and Text. It is fairly easy to understand the relation between them and Java’s primitive types. LongWritable is equivalent to long, IntWritable to int and Text to String.

Any value in Hadoop must be Writable. A Writable in an interface in Hadoop and types in Hadoop must implement this interface. Hadoop provides these writable wrappers for almost all Java primitive types and some other types.

Now the obvious question is why does Hadoop use these types instead of Java types?

Why does Hadoop use Writable(s)?

As we already know, data needs to be transmitted between different nodes in a distributed computing environment. This requires serialization and deserialization of data to convert the data that is in structured format to byte stream and vice-versa. Hadoop therefore uses simple and efficient serialization protocol to serialize data between map and reduce phase and these are called Writable(s). Some of the examples of writables as already mentioned before are IntWritable, LongWritable, BooleanWritable and FloatWritable. The entire list is in org.apache.hadoop.io package of the Hadoop Source (http://hadoop.apache.org/docs/current/api/index.html).

Limitation of primitive Hadoop Writable classes

In the wordCount example we emit Text as the key and IntWritable as the value from the Mappers and Reducers. Although Hadoop provides many primitive Writable that can be used in simple applications like wordcount, but clearly these cannot serve our purpose all the time.

Consider a scenario where we would like to transmit a 3-D point as a value from the Mappers/Reducers. The structure of the 3D point would be like,

class point3D
{
    public float x;
    public float y;
    public float z;
}

Now if you want to still use the primitive Hadoop Writable(s), you would have to convert the value into a string and transmit it. However it gets very messy when you have to deal with string manipulations.

Also, what if you want to transmit this as a key? As we already know Hadoop does the sorting and shuffling automatically, then these point will get sorted based on string values, which would not be correct. So clearly we need to write custom data types that can be used in Hadoop.

Custom Writable

So any user defined class that implements the Writable interface is a custom writable. So let us first look into the structure of writable interface.

public interface Writable
{
    void readFields(DataInput in);
    void write(DataOutput out);
}

So the class implementing this interface must provide the implementation of these two method at the very least. So let us now look into these two methods in detail.

write(DataOutput out) – It is used to serialize the fields of the object to ‘out’.
readFields(DataInput in) – It is used to deserialize the fields of the object from ‘in’.

However, we need a custom Writable comparable if our custom data type is going to be used as key rather that the value. We then need the class to implement WritableComparable interface. The WritableComparable interface extends from the Writable interface and the Compararble interface its structure is as given below:

public interface WritableComparable extends Writable, Comparable
{
    void readFields(DataInput in);
    void write(DataOutput out);
    int compareTo(WritableComparable o)
}

compareTo(WritableComparable o) – It is inherited from Comparable interface and it allows Hadoop to sort the keys in the sort and shuffle phase.

BigramCount Example

Let us know look into the BigramCount example which will solidify the concepts that we have learnt till now in this post. This example is a good extension to the wordCount example, and will also teach us how to write a custom Writable.

Code the custom Writable class

In BigramCount we need to count the frequency of the occurrence of two words together in the text. So we are going to define a custom class that is going to hold the two words together.

The code for that is as given below:

import java.io.DataInput;
import java.io.DataOutput;
import java.io.IOException;

import org.apache.hadoop.io.Text;
import org.apache.hadoop.io.WritableComparable;

public class TextPair implements WritableComparable {

	private Text first;
	private Text second;

	public TextPair(Text first, Text second) {
		set(first, second);
	}

	public TextPair() {
		set(new Text(), new Text());
	}

	public TextPair(String first, String second) {
		set(new Text(first), new Text(second));
	}

	public Text getFirst() {
		return first;
	}

	public Text getSecond() {
		return second;
	}

	public void set(Text first, Text second) {
		this.first = first;
		this.second = second;
	}

	@Override
	public void readFields(DataInput in) throws IOException {
		first.readFields(in);
		second.readFields(in);
	}

	@Override
	public void write(DataOutput out) throws IOException {
		first.write(out);
		second.write(out);
	}

	@Override
	public String toString() {
		return first + " " + second;
	}

	@Override
	public int compareTo(TextPair tp) {
		int cmp = first.compareTo(tp.first);

		if (cmp != 0) {
			return cmp;
		}

		return second.compareTo(tp.second);
	}

	@Override
	public int hashCode(){
		return first.hashCode()*163 + second.hashCode();
	}

	@Override
	public boolean equals(Object o)
	{
		if(o instanceof TextPair)
		{
			TextPair tp = (TextPair) o;
			return first.equals(tp.first) && second.equals(tp.second);
		}
		return false;
	}

}

We have already seen the explanation of readFields(), write() and compareTo(). And just as you would for any value object you write in Java, you should override the hashCode()equals(), and toString() methods from java.lang.Object. The hashCode() method is used by the HashPartitioner (the default partitioner in MapReduce) to choose a reduce partition, so you should make sure that you write a good hash function that mixes well to ensure reduce partitions are of a similar size.

Code the Mapper

The Mapper just as the mapper of the wordCount example, takes the combination to two adjacent words and emits the TextPair and a value of ‘1’.

The code for the Mapper is as given below:

import java.io.IOException;

import org.apache.hadoop.io.IntWritable;
import org.apache.hadoop.io.LongWritable;
import org.apache.hadoop.io.Text;
import org.apache.hadoop.mapreduce.Mapper;

public class BigramCountMapper extends Mapper<LongWritable, Text, TextPair, IntWritable>{

	private static Text lastWord = null;
	private static TextPair textPair = new TextPair();
	private static Text wordText = new Text();
	private static IntWritable one = new IntWritable(1);

	@Override
	public void map(LongWritable key, Text value, Context context) throws IOException, InterruptedException
	{
		String line = value.toString();
		line = line.replace(",", "");
		line = line.replace(".", "");

		for(String word: line.split("\\W+"))
		{
			if(lastWord == null)
			{
				lastWord = new Text(word);
			}
			else
			{
				wordText.set(word);
				textPair.set(lastWord, wordText);
				context.write(textPair, one);
				lastWord.set(wordText.toString());
			}
		}
	}
}
Code the Reducer

Hadoop takes all the emitted key-value pair from the Mapper and does the sorting and shuffling. After that all the values that have the same TextPair associated with them is put in the iterable list. This value is then provided to the Reducer. In Reducer we just add the values in the list, just as we had done in case of the wordCount.

The code for the Reducer is as given below:

import java.io.IOException;

import org.apache.hadoop.io.IntWritable;
import org.apache.hadoop.io.Text;
import org.apache.hadoop.mapreduce.Reducer;

public class BigramCountReducer extends Reducer<TextPair, IntWritable, Text, IntWritable>{
	private static Text textPairText = new Text();
	@Override
	public void reduce(TextPair key, Iterable values, Context context) throws IOException, InterruptedException
	{
        int count=0;
        for(IntWritable value: values)
        {
            count += value.get();
        }

        textPairText.set(key.toString());
        context.write(textPairText, new IntWritable(count));
	}
}
Code the Driver

Finally, we will code the driver class that controls the job. Here we will need to mention the MapperOutputKey class as TextPair.class, which is the custom writable class.

The code for the Driver is as given below:

import java.io.IOException;

import org.apache.hadoop.conf.Configuration;
import org.apache.hadoop.fs.Path;
import org.apache.hadoop.io.IntWritable;
import org.apache.hadoop.io.Text;
import org.apache.hadoop.mapreduce.Job;
import org.apache.hadoop.mapreduce.lib.input.FileInputFormat;
import org.apache.hadoop.mapreduce.lib.output.FileOutputFormat;

public class BigramCount {
	public static void main(String args[]) throws IOException, InterruptedException, ClassNotFoundException {
		if (args.length != 2) {
			System.err.println("Inavlid Command!");
			System.err.println("Usage: BigramCount <input type="text" /> <output>");
			System.exit(0);
		}

		Configuration conf = new Configuration();
		conf.set("mapreduce.jobtracker.address", "local");
		conf.set("fs.defaultFS","file:///");

		Job job = new Job(conf);

		job.setJarByClass(BigramCount.class);
		job.setJobName("Word Count");

		FileInputFormat.addInputPath(job, new Path(args[0]));
		FileOutputFormat.setOutputPath(job, new Path(args[1]));

		job.setMapperClass(BigramCountMapper.class);
		job.setReducerClass(BigramCountReducer.class);

		job.setMapOutputKeyClass(TextPair.class);
		job.setMapOutputValueClass(IntWritable.class);

		job.setOutputKeyClass(Text.class);
		job.setOutputValueClass(IntWritable.class);

		System.exit(job.waitForCompletion(true) ? 0 : 1);
	}
}
Setup the input directory in HDFS

Download ebooks from Project Gutenberg(http://www.gutenberg.org/). Save the ebook as plain text in a directory with the name ‘input’.

Later, we need to move this directory in HDFS. To do that, type the following in the terminal:

$ hadoop-1.1.2/bin/hadoop fs -put ~/Desktop/input/ .

This will move the directory in HDFS as seen below.

$ hadoop-1.1.2/bin/hadoop fs -ls
Found 1 items
drwxr-xr-x   - hadoop supergroup          0 2013-11-20 23:13 /user/hadoop/input
Run the job
$ hadoop-1.1.2/bin/hadoop jar ~/Desktop/bigramCount.jar BigramCount input output
13/11/20 23:13:28 WARN mapred.JobClient: Use GenericOptionsParser for parsing the arguments. Applications should implement Tool for the same.
13/11/20 23:13:28 INFO input.FileInputFormat: Total input paths to process : 1
13/11/20 23:13:28 WARN util.NativeCodeLoader: Unable to load native-hadoop library for your platform... using builtin-java classes where applicable
13/11/20 23:13:28 WARN snappy.LoadSnappy: Snappy native library not loaded
13/11/20 23:13:28 INFO mapred.JobClient: Running job: job_201311202308_0003
13/11/20 23:13:29 INFO mapred.JobClient:  map 0% reduce 0%
13/11/20 23:13:35 INFO mapred.JobClient:  map 100% reduce 0%
13/11/20 23:13:43 INFO mapred.JobClient:  map 100% reduce 33%
13/11/20 23:13:45 INFO mapred.JobClient:  map 100% reduce 100%
13/11/20 23:13:46 INFO mapred.JobClient: Job complete: job_201311202308_0003
13/11/20 23:13:46 INFO mapred.JobClient: Counters: 26
13/11/20 23:13:46 INFO mapred.JobClient:   Job Counters
13/11/20 23:13:46 INFO mapred.JobClient:     Launched reduce tasks=1
13/11/20 23:13:46 INFO mapred.JobClient:     SLOTS_MILLIS_MAPS=5779
13/11/20 23:13:46 INFO mapred.JobClient:     Total time spent by all reduces waiting after reserving slots (ms)=0
13/11/20 23:13:46 INFO mapred.JobClient:     Total time spent by all maps waiting after reserving slots (ms)=0
13/11/20 23:13:46 INFO mapred.JobClient:     Launched map tasks=1
13/11/20 23:13:46 INFO mapred.JobClient:     Data-local map tasks=1
13/11/20 23:13:46 INFO mapred.JobClient:     SLOTS_MILLIS_REDUCES=9545
13/11/20 23:13:46 INFO mapred.JobClient:   File Output Format Counters
13/11/20 23:13:46 INFO mapred.JobClient:     Bytes Written=343198
13/11/20 23:13:46 INFO mapred.JobClient:   FileSystemCounters
13/11/20 23:13:46 INFO mapred.JobClient:     FILE_BYTES_READ=803716
13/11/20 23:13:46 INFO mapred.JobClient:     HDFS_BYTES_READ=274173
13/11/20 23:13:46 INFO mapred.JobClient:     FILE_BYTES_WRITTEN=1711913
13/11/20 23:13:46 INFO mapred.JobClient:     HDFS_BYTES_WRITTEN=343198
13/11/20 23:13:46 INFO mapred.JobClient:   File Input Format Counters
13/11/20 23:13:46 INFO mapred.JobClient:     Bytes Read=274059
13/11/20 23:13:46 INFO mapred.JobClient:   Map-Reduce Framework
13/11/20 23:13:46 INFO mapred.JobClient:     Map output materialized bytes=803716
13/11/20 23:13:46 INFO mapred.JobClient:     Map input records=4893
13/11/20 23:13:46 INFO mapred.JobClient:     Reduce shuffle bytes=803716
13/11/20 23:13:46 INFO mapred.JobClient:     Spilled Records=93962
13/11/20 23:13:46 INFO mapred.JobClient:     Map output bytes=709748
13/11/20 23:13:46 INFO mapred.JobClient:     Total committed heap usage (bytes)=269619200
13/11/20 23:13:46 INFO mapred.JobClient:     Combine input records=0
13/11/20 23:13:46 INFO mapred.JobClient:     SPLIT_RAW_BYTES=114
13/11/20 23:13:46 INFO mapred.JobClient:     Reduce input records=46981
13/11/20 23:13:46 INFO mapred.JobClient:     Reduce input groups=24292
13/11/20 23:13:46 INFO mapred.JobClient:     Combine output records=0
13/11/20 23:13:46 INFO mapred.JobClient:     Reduce output records=24292
13/11/20 23:13:46 INFO mapred.JobClient:     Map output records=46981

You can now view the output from HDFS itself or download the directory on the local hard disk using the get command.

The output would look similar to the following:

...
command of	4
command the	1
commanded by	4
commanded the	1
commanded with	2
commander 10	1
commander Colonel	2
commander General	1
commander Prince	1
commander dated	1
commander decided	1
commander hastily	1
commander of	8
commander sent	1
...

Note – Going through the wordCount post before this post is strongly advised.

—–
References :-

  1. http://developer.yahoo.com/hadoop/tutorial/module5.html
  2. Hadoop – The Definitive Guide (Tom White)
Unit Test MapReduce using MRUnit

In order to make sure that your code is correct, you need to Unit test your code first. And like you unit test your Java code using JUnit testing framework, the same can be done using MRUnit to test MapReduce Jobs.

MRUnit is built on top of JUnit framework. So we will use the JUnit classes to implement unit test code for MapReduce. If you are familiar with JUnits then you will find unit testing for MapReduce jobs also follows the same pattern.

I will now discuss the template that can be used for writing any unit test for MapReduce job.

To Unit test MapReduce jobs:

  1. Create a new test class to the existing project
  2. Add the mrunit jar file to build path
  3. Declare the drivers
  4. Write a method for initializations & environment setup
  5. Write a method to test mapper
  6. Write a method to test reducer
  7. Write a method to test the whole MapReduce job
  8. Run the test

Create a new test class to the existing project

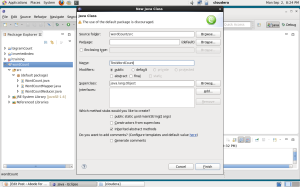
I’ll use the WordCount example to demonstrate unit testing. First create a new class with the name “TestWordCount” in the existing wordCount project.

1

2

Add the mrunit jar file to build path

Download the latest mrunit jar file from http://apache.cs.utah.edu/mrunit/mrunit-1.0.0/. Unzip the folder and you will find mrunit jar file inside the lib directory. We need to add that jar to the build path.

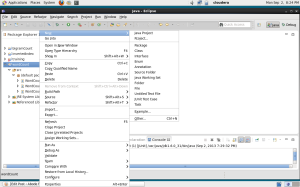
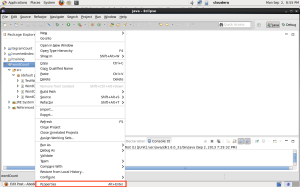
Right click on the project and click on “Properties”.

3

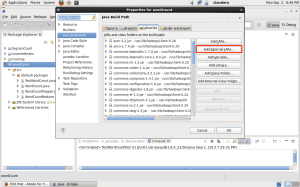
Click on Add external Jar file and add the jar file you recently downloaded.

4

Declare the drivers

Instead of running the actual driver class, for unit testing we will declare drivers to test mapper, reducer and the whole MapReduce job.

MapDriver<LongWritable, Text, Text, IntWritable> mapDriver;
ReduceDriver<Text, IntWritable, Text, IntWritable> reduceDriver;
MapReduceDriver<LongWritable, Text, Text, IntWritable, Text, IntWritable> mapReduceDriver;

Note that you need to import the following:

import org.apache.hadoop.mrunit.mapreduce.MapDriver;
import org.apache.hadoop.mrunit.mapreduce.MapReduceDriver;
import org.apache.hadoop.mrunit.mapreduce.ReduceDriver;

and not

import org.apache.hadoop.mrunit.MapDriver;
import org.apache.hadoop.mrunit.MapReduceDriver;
import org.apache.hadoop.mrunit.ReduceDriver;

As the word count mapper takes LongWritable offset and Text of line, we have given the same as the generic parameters of the mapDriver. Same is the case with the reduceDriver and mapReduceDriver.

Write a method for initializations & environment setup

This is the code that runs before any (and every) test runs and can be used for all the initializations that you want to do. You will need to add @Before annotation before this method.

@Before
public void setUp()
{
	WordCountMapper mapper = new WordCountMapper();
	mapDriver = new MapDriver<LongWritable, Text, Text, IntWritable>();
	mapDriver.setMapper(mapper);

	WordCountReducer reducer = new WordCountReducer();
	reduceDriver = new ReduceDriver<Text, IntWritable, Text, IntWritable>();
	reduceDriver.setReducer(reducer);

	mapReduceDriver = new MapReduceDriver<LongWritable, Text, Text, IntWritable, Text, IntWritable>();
	mapReduceDriver.setMapper(mapper);
	mapReduceDriver.setReducer(reducer);
}

In the first three lines of the above code, we create an object of the mapDriver and set the mapper for the driver. Note that we are not setting the reducer class. It is because the mapDriver will only test the mapper logic.

Similarly we set the reducer class to the reduceDriver. However, when we want to test the MapRedcue job as a whole, we need to test both the mapper and the reducer. Therefore we need to set both the mapper and reducer class to the mapReduceDriver.

Write a method to test mapper

To declare a method as a test method it must be annotated with @Test.

@Test
public void testMapper() throws IOException
{
	mapDriver.withInput(new LongWritable(1), new Text("orange orange apple"));
	mapDriver.withOutput(new Text("orange"), new IntWritable(1));
	mapDriver.withOutput(new Text("orange"), new IntWritable(1));
	mapDriver.withOutput(new Text("apple"), new IntWritable(1));
	mapDriver.runTest();
}

The mapDriver takes as input a LongWritable and a Text “apple orange orange” in the form of key value pair. We want out wordCountMapper to output each word as key and “1” as the value. So we set the output of the driver accordingly. Finally runTest method runs the mapDriver.

Write a method to test reducer

In the wordCount example, we get a word and list of IntWritable values (all 1’s) associated with it. The reducer code is then supposed to give the final ouput with word as key and its count as value. To test the reducer functionality we use the code given below.

@Test
public void testReducer() throws IOException
{
	List values = new ArrayList();
	values.add(new IntWritable(1));
	values.add(new IntWritable(1));
	reduceDriver.withInput(new Text("orange"), values);
	reduceDriver.withOutput(new Text("orange"), new IntWritable(2));
	reduceDriver.runTest();
}

Write a method to test the whole MapReduce job

In order to test the complete MapReduce job, we give the input offset as key and line of text as value to the mapReduceDriver. And the final output is supposed to be the word as key and its count as the value. We therefore set addInput and addOutput appropriately.

@Test
public void testMapperReducer() throws IOException
{
	mapReduceDriver.addInput(new LongWritable(1), new Text("orange orange apple"));
	mapReduceDriver.addOutput(new Text("orange"), new IntWritable(2));
	mapReduceDriver.addOutput(new Text("apple"), new IntWritable(1));
	mapReduceDriver.runTest();
}

Run the test

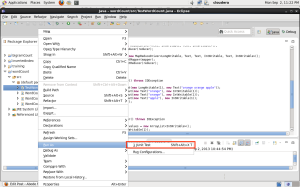
To run the test, right click on the class “TestWordCount” and goto “Run as” and select “Junit Test”.

11

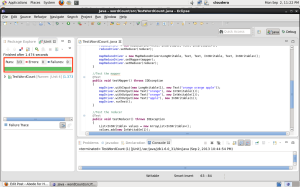
If the mapper, reducer and mapReduce job as a whole is correct, then you should get an output where you see no errors or failures.

10

Run MapReduce Job in Standalone Mode

In the last post we saw how to run our first MapReduce job. If you gone through the previous post, you will remember that I had mentioned the steps that you must conform to before running your code on an actual cluster. You must,

  • First run you MapReduce code in Standalone Mode. It gives you the chance to put break points in your code and debug it extensively with a small input file stored locally.
  • Next you must Unit test your code. This will be covered in the next post.
  • You are then ready to run it in Psuedo Distributed Mode, where all your daemons will be running.
  • If you find the performance of your code satisfactory, you are then ready to run it on a real cluster.

As I had explained in my previous posts, there are no daemons running in Standalone Mode. So in order to run the job in this mode, we need to make the following configuration changes:

  • Set the default file system to local (denoted by file:///)
  • Set the address of the JobTracker to local

We can make these changes by adding the following code in the driver:

 Configuration conf = new Configuration();
 conf.set("mapreduce.jobtracker.address", "local");
 conf.set("fs.defaultFS","file:///");

 Job job = new Job(conf);
 

To run it Eclipse, right click on the driver class and goto Run As > Run Configurations …

Select Java Applications from the left panel, and enter the name of the project and main class (E.g. Project Name – wordCount and Driver Class – WordCount)

In the arguments tab, give the input and the output path in the format: <input_path> <output_path>. You can set breakpoints if you want to and execute the job.

In the next post, we will see how to Unit test MapReduce jobs using MRUnit.

Hello World of MapReduce – Word Count

Its finally time to attempt our first MapReduce program. As with any programming language the first program you try is “Hello World”. We execute “Hello World” because it the easiest and we test whether the everything is perfectly installed and configured.

The easiest problem in MapReduce is the word count problem and is therefore called MapReduce’s “Hello World” by many people. So let us dive into it.

In the word count problem, we need to find the number of occurrences of each word in the entire document. I already explained how the map, shuffle & sort and reduce phases of MapReduce taking this example. Please go through that post if you are unclear about it.

We will use eclipse provided with the Cloudera’s Demo VM to code MapReduce.

Step 1: Create a new project – Open eclipse. Add a new Java Project and name it as “wordCount”.

Step 2: Setup the Library – Right click on the newly created wordCount project and click on “Properties”. Select “Java Build Path” from the left panel. Click “Add external JARs..”.

  • Add all the JARs from /usr/lib/hadoop/client-0.20
  • Add “hadoop-annotations.jar”, “hadoop-auth.jar” and “hadoop-common.jar” from /usr/lib/hadoop
  • Add “hadoop-httpclient-3.1.jar” from /usr/lib/hadoop/lib

Step 3: Code the Mapper – To run MapReduce jobs we need three things: Map function, Reduce function & some code to run the job (also known as driver). For Map function we will write a Mapper class.

import java.io.IOException;

import org.apache.hadoop.io.IntWritable;
import org.apache.hadoop.io.LongWritable;
import org.apache.hadoop.io.Text;
import org.apache.hadoop.mapreduce.Mapper;


public class WordCountMapper extends Mapper<LongWritable, Text, Text, IntWritable>
{   
    @Override
    public void map(LongWritable key, Text value, Context context) throws IOException, InterruptedException
    {
        String line = value.toString();
       
        //Split the line into words
        for(String word: line.split("\\W+"))
        {
            //Make sure that the word is legitimate
            if(word.length() > 0)
            {
                //Emit the word as you see it
                context.write(new Text(word), new IntWritable(1));
            }
        }
    }
}

As you see the WordCountMapper extends the Mapper Class. The class expects four parameters. The first two parameters are the input key-value pair type and the next two are the intermediate output key-value pair type. Also we override the default map implementation, because the default map function is an identity function.

In the program, we convert each line (value) to string and break it into words. And then for each word we send an intermediate key-value pair of the form (word, 1) to the next phase.
The intermediate key-value pairs now to the shuffle and sort phase where all the pairs with same key are grouped under one key and the values are put in the list. In our case, we get all the key-value pairs in (word, 1) form. So in shuffle & sort phase, we will get (word1, [1, 1, …]), (word2, [1, …]) and so on.

Another thing to note here is that Hadoop has its own basic data types such as Text (for String) and IntWritable (for int). Hadoop provides these data types for optimized serilization.

Step 4: Code the Reducer – The Reducer will take the intermediate key-value pair as input. And for each key-value pair the reduce funtion will be executed.


import java.io.IOException;

import org.apache.hadoop.io.IntWritable;
import org.apache.hadoop.io.Text;
import org.apache.hadoop.mapreduce.Reducer;


public class WordCountReducer extends Reducer<Text, IntWritable, Text, IntWritable>{

    @Override
    public void reduce(Text key, Iterable<IntWritable> values, Context context) throws IOException, InterruptedException
    {
        //Initializing the word count to 0 for every key
        int count=0;
       
        for(IntWritable value: values)
        {
            //Adding the word count counter to count
            count += value.get();
        }
       
        //Finally write the word and its count
        context.write(key, new IntWritable(count));
    }
}

In the overridden reduce function, we add all the 1’s for every key(word). And for every word, we output the word itself and its count.

Step 5: Code the Driver – We need code to manage the MapReduce job. We call it the driver. The task of the driver is to configure the Job. Job defines the way in which MapReduce is run.


import org.apache.hadoop.fs.Path;
import org.apache.hadoop.io.IntWritable;
import org.apache.hadoop.io.Text;
import org.apache.hadoop.mapreduce.Job;
import org.apache.hadoop.mapreduce.lib.input.FileInputFormat;
import org.apache.hadoop.mapreduce.lib.output.FileOutputFormat;


public class WordCount {
    public static void main(String args[]) throws Exception
    {
        //Check the correctness of the entered command
        if(args.length != 2)
        {
            System.err.println("Inavlid Command!");
            System.err.println("Usage: WordCount <input path> <output path>");
            System.exit(0);
        }
       
        //Instantiate the job object for configuring your job
        Job job = new Job();
       
        //Specify the class that hadoop needs to look in the JAR file
        //This Jar file is then sent to all the machines in the cluster
        job.setJarByClass(WordCount.class);
       
        //Set a meaningful name to the job
        job.setJobName("Word Count");
       
        //Add the apth from where the file input is to be taken
        FileInputFormat.addInputPath(job, new Path(args[0]));
       
        //Set the path where the output must be stored
        FileOutputFormat.setOutputPath(job, new Path(args[1]));
       
        //Set the Mapper and the Reducer class
        job.setMapperClass(WordCountMapper.class);
        job.setReducerClass(WordCountReducer.class);
       
        //Set the type of the key and value of Mapper and reducer
        /*
         * If the Mapper output type and Reducer output type are not the same then
         * also include setMapOutputKeyClass() and setMapOutputKeyValue()
         */
        job.setOutputKeyClass(Text.class);
        job.setOutputValueClass(IntWritable.class);
       
        //Start the job and wait for it to finish. And exit the program based on
        //the success of the program
        System.exit(job.waitForCompletion(true)?0:1);
    }
}

As you see, we instantiate the Job object and specify the following:

  • Class which will be called to run the job
  • Input directory
  • Location where the output should get stored
  • Mapper and Reduce class
  • Type information of the output key-value pairs of Mapper and Reducer

On successful completion, we exit the code.

Step 6: Run the code – To run the MapReduce job, you must have the input files in the HDFS.

The command to the run the Hadoop Job is as follows:

$:~ hadoop jar <jar_filename.jar> <driver_classname> <input_path> <output_path>

You will get the output similar to the following:

hadoop jar wordCount.jar WordCount input/les_miserables wordCount
13/08/20 17:07:49 WARN mapred.JobClient: Use GenericOptionsParser for parsing the arguments. Applications should implement Tool for the same.
13/08/20 17:07:49 INFO input.FileInputFormat: Total input paths to process : 1
13/08/20 17:07:50 INFO mapred.JobClient: Running job: job_201308201538_0002
13/08/20 17:07:51 INFO mapred.JobClient:  map 0% reduce 0%
13/08/20 17:08:04 INFO mapred.JobClient:  map 100% reduce 0%
13/08/20 17:08:13 INFO mapred.JobClient:  map 100% reduce 100%
13/08/20 17:08:15 INFO mapred.JobClient: Job complete: job_201308201538_0002
13/08/20 17:08:15 INFO mapred.JobClient: Counters: 32
13/08/20 17:08:15 INFO mapred.JobClient:   File System Counters
13/08/20 17:08:15 INFO mapred.JobClient:     FILE: Number of bytes read=1284228
13/08/20 17:08:15 INFO mapred.JobClient:     FILE: Number of bytes written=2126389
13/08/20 17:08:15 INFO mapred.JobClient:     FILE: Number of read operations=0
13/08/20 17:08:15 INFO mapred.JobClient:     FILE: Number of large read operations=0
13/08/20 17:08:15 INFO mapred.JobClient:     FILE: Number of write operations=0
13/08/20 17:08:15 INFO mapred.JobClient:     HDFS: Number of bytes read=3322799
13/08/20 17:08:15 INFO mapred.JobClient:     HDFS: Number of bytes written=281178
13/08/20 17:08:15 INFO mapred.JobClient:     HDFS: Number of read operations=2
13/08/20 17:08:15 INFO mapred.JobClient:     HDFS: Number of large read operations=0
13/08/20 17:08:15 INFO mapred.JobClient:     HDFS: Number of write operations=1
13/08/20 17:08:15 INFO mapred.JobClient:   Job Counters
13/08/20 17:08:15 INFO mapred.JobClient:     Launched map tasks=1
13/08/20 17:08:15 INFO mapred.JobClient:     Launched reduce tasks=1
13/08/20 17:08:15 INFO mapred.JobClient:     Data-local map tasks=1
13/08/20 17:08:15 INFO mapred.JobClient:     Total time spent by all maps in occupied slots (ms)=14105
13/08/20 17:08:15 INFO mapred.JobClient:     Total time spent by all reduces in occupied slots (ms)=7600
13/08/20 17:08:15 INFO mapred.JobClient:     Total time spent by all maps waiting after reserving slots (ms)=0
13/08/20 17:08:15 INFO mapred.JobClient:     Total time spent by all reduces waiting after reserving slots (ms)=0
13/08/20 17:08:15 INFO mapred.JobClient:   Map-Reduce Framework
13/08/20 17:08:15 INFO mapred.JobClient:     Map input records=68116
13/08/20 17:08:15 INFO mapred.JobClient:     Map output records=577599
13/08/20 17:08:15 INFO mapred.JobClient:     Map output bytes=5422971
13/08/20 17:08:15 INFO mapred.JobClient:     Input split bytes=152
13/08/20 17:08:15 INFO mapred.JobClient:     Combine input records=0
13/08/20 17:08:15 INFO mapred.JobClient:     Combine output records=0
13/08/20 17:08:15 INFO mapred.JobClient:     Reduce input groups=26763
13/08/20 17:08:15 INFO mapred.JobClient:     Reduce shuffle bytes=524076
13/08/20 17:08:15 INFO mapred.JobClient:     Reduce input records=577599
13/08/20 17:08:15 INFO mapred.JobClient:     Reduce output records=26763
13/08/20 17:08:15 INFO mapred.JobClient:     Spilled Records=1732797
13/08/20 17:08:15 INFO mapred.JobClient:     CPU time spent (ms)=4840
13/08/20 17:08:15 INFO mapred.JobClient:     Physical memory (bytes) snapshot=289259520
13/08/20 17:08:15 INFO mapred.JobClient:     Virtual memory (bytes) snapshot=1410568192
13/08/20 17:08:15 INFO mapred.JobClient:     Total committed heap usage (bytes)=

Step 7: View the outputIn the output directory you will see _logs, _SUCCESS and part-r-00000. The output gets stored in part-r-00000 file.

[cloudera@localhost ~]$ hadoop fs -cat wordCount/part-r-00000
000	7
1	76
10	6
100	4
105th	2
1098	1
10th	7
11	3
1140	1
1148	1
....

You can also copy the output to your local disk. To do so, execute the command:

[cloudera@localhost ~]$ hadoop fs -get wordCount ~/Desktop

Basic HDFS commands

Before we move on to developing our first MapReduce program, it is essential to know few basic HDFS commands to play with.

First open the Cloudera’s virtual image from the virtual box. Open the terminal type the following command:

[cloudera@localhost ~]$ hadoop
Usage: hadoop [--config confdir] COMMAND
where COMMAND is one of:
fs                   run a generic filesystem user client
version              print the version
jar             run a jar file
checknative [-a|-h]  check native hadoop and compression libraries availability
distcp   copy file or directories recursively
archive -archiveName NAME -p  *  create a hadoop archive
classpath            prints the class path needed to get the
Hadoop jar and the required libraries
daemonlog            get/set the log level for each daemon
or
CLASSNAME            run the class named CLASSNAME
Most commands print help when invoked w/o parameters.

As you can see, it gives you the list of hadoop commands and a short descrition. There is a subsystem associated with HDFS called fsShell. To invoke the shell type the following command:

[cloudera@localhost ~]$ hadoop fs
Usage: hadoop fs [generic options]
[-cat [-ignoreCrc]  ...]
[-chgrp [-R] GROUP PATH...]
[-chmod [-R] &lt;MODE[,MODE]... | OCTALMODE&gt; PATH...]
[-chown [-R] [OWNER][:[GROUP]] PATH...]
[-copyFromLocal  ... ]
[-copyToLocal [-ignoreCrc] [-crc]  ... ]
[-count [-q]  ...]
[-cp  ... ]
[-df [-h] [ ...]]
[-du [-s] [-h]  ...]
[-expunge]
[-get [-ignoreCrc] [-crc]  ... ]
[-getmerge [-nl]  ]
[-help [cmd ...]]
[-ls [-d] [-h] [-R] [ ...]]
[-mkdir [-p]  ...]
[-moveFromLocal  ... ]
[-moveToLocal  ]
[-mv  ... ]
[-put  ... ]
[-rm [-f] [-r|-R] [-skipTrash]  ...]
[-rmdir [--ignore-fail-on-non-empty]&lt;/pre&gt;
&lt;dir&gt;...]&lt;/dir&gt;
&lt;pre&gt;&lt;/pre&gt;
&lt;dir&gt;[-setrep [-R] [-w] &lt;path/file&gt; ...]&lt;/dir&gt;
&lt;pre&gt;&lt;/pre&gt;
&lt;dir&gt;[-stat [format] ...]&lt;/dir&gt;
&lt;pre&gt;&lt;/pre&gt;
&lt;dir&gt;[-tail [-f] ]&lt;/dir&gt;
&lt;pre&gt;&lt;/pre&gt;
&lt;dir&gt;[-test -[ezd] ]&lt;/dir&gt;
&lt;pre&gt;&lt;/pre&gt;
&lt;dir&gt;[-text [-ignoreCrc] ...]&lt;/dir&gt;
&lt;pre&gt;&lt;/pre&gt;
&lt;dir&gt;[-touchz ...]&lt;/dir&gt;
&lt;pre&gt;&lt;/pre&gt;
&lt;dir&gt;[-usage [cmd ...]]&lt;/dir&gt;
&lt;pre&gt;&lt;/pre&gt;
&lt;dir&gt;Generic options supported are&lt;/dir&gt;
&lt;pre&gt;&lt;/pre&gt;
&lt;dir&gt;-conf      specify an application configuration file&lt;/dir&gt;
&lt;pre&gt;&lt;/pre&gt;
&lt;dir&gt;-D &lt;property=value&gt;            use value for given property&lt;/dir&gt;
&lt;pre&gt;&lt;/pre&gt;
&lt;dir&gt;-fs &lt;local|namenode:port&gt;      specify a namenode&lt;/dir&gt;
&lt;pre&gt;&lt;/pre&gt;
&lt;dir&gt;-jt &lt;local|jobtracker:port&gt;    specify a job tracker&lt;/dir&gt;
&lt;pre&gt;&lt;/pre&gt;
&lt;dir&gt;-files     specify comma separated files to be copied to the map reduce cluster&lt;/dir&gt;
&lt;pre&gt;&lt;/pre&gt;
&lt;dir&gt;-libjars     specify comma separated jar files to include in the classpath.&lt;/dir&gt;
&lt;pre&gt;&lt;/pre&gt;
&lt;dir&gt;-archives     specify comma separated archives to be unarchived on the compute machines.&lt;/dir&gt;
&lt;pre&gt;&lt;/pre&gt;
&lt;dir&gt;The general command line syntax is&lt;/dir&gt;
&lt;pre&gt;&lt;/pre&gt;
&lt;dir&gt;bin/hadoop command [genericOptions] [commandOptions]&lt;/dir&gt;
&lt;pre&gt;&lt;/pre&gt;
&lt;dir&gt;

As you can see it will give you list of all the fs shell commands. We will look into a few basic important commands.

List the contents of a directory

[cloudera@localhost ~]$ hadoop fs -ls /
Found 5 items
drwxr-xr-x   - hbase hbase               0 2013-07-17 00:05 /hbase
drwxr-xr-x   - solr  solr                0 2013-07-17 00:03 /solr
drwxrwxrwx   - hdfs  supergroup          0 2013-08-10 13:41 /tmp
drwxr-xr-x   - hdfs  supergroup          0 2013-07-17 00:04 /user
drwxr-xr-x   - hdfs  supergroup          0 2013-07-17 00:03 /var

The above command will list the contents of the root directory in HDFS.

[cloudera@localhost ~]$ hadoop fs -ls
Found 2 items
drwx------   - cloudera cloudera          0 2013-08-19 11:45 .Trash
drwx------   - cloudera cloudera          0 2013-08-10 13:42 .staging

As you see, if you dont give the path it automatically lists the contents of the home directory (/user/cloudera).

Create a directory

[cloudera@localhost ~]$ hadoop fs -mkdir test

The above command will create a directory with the name “test” under the home directory.

[cloudera@localhost ~]$ hadoop fs -ls
Found 3 items
drwx------   - cloudera cloudera          0 2013-08-19 11:45 .Trash
drwx------   - cloudera cloudera          0 2013-08-10 13:42 .staging
drwxr-xr-x   - cloudera cloudera          0 2013-08-19 12:28 test

Delete a directory

[cloudera@localhost ~]$ hadoop fs -rmdir test

The above command will delete the directory test from the home directory. Similarly to delete a file/folder recursively, you can execute the command:

[cloudera@localhost ~]$ hadoop fs -rm -r &lt;folder_name&gt;

Upload data into HDFS

First locate folder where the data to be uploaded is stored.

[cloudera@localhost ~]$ cd ~
[cloudera@localhost ~]$ cd Desktop
[cloudera@localhost Desktop]$ ls
Eclipse.desktop  NewsFeed

Suppose I want to upload the NewsFeed folder from my local file system to HDFS. To do so, we need to execute the following command:

[cloudera@localhost Desktop]$ hadoop fs -put NewsFeed /user/cloudera/test

You can now view the contents of the test folder in HDFS.

[cloudera@localhost Desktop]$ hadoop fs -ls test
Found 1 items
-rw-r--r--   3 cloudera cloudera         35 2013-08-19 12:53 test/news_feed

As you can see the desired folder has been uploaded into the HDFS.

Download data from HDFS

You might want to download the data from HDFS to local file system. To do so execute the following command:

[cloudera@localhost Desktop]$ hadoop fs -get test ~/Desktop
[cloudera@localhost Desktop]$ ls
Eclipse.desktop  NewsFeed  test

This colcludes the post. As you can see the commands are very similar to a posix shell command. You can read about the other commands from http://hadoop.apache.org/docs/r0.19.1/hdfs_shell.html.

In the next post, we will create our first MapReduce program.

Install Cloudera’s Hadoop Demo VM

Installing Clouder’s Hadoop Demo VM would be the best and easiest way to learn and start working with Hadoop. The virtual Machine is installed in Pseudo Distributed mode. It is best to test your code first in this mode before you run it in the actual cluster.

The step to install Clouder’s Hadoop Demo VM using Virtual Box are as follows:-

Step 1: Download & install the latest version of the Virtual Box (https://www.virtualbox.org/wiki/Downloads).

Step 2: Download Cloudera’s Demo VM (http://www.cloudera.com/content/support/en/downloads/download-components/download-products.html?productID=F6mO278Rvo).

Choose the version as Virtual Box and click on Download.

Step 3: Unarchive the downloaded file. You will find the folder having two files (cloudera-quickstart-vm-4.3.0-virtualbox-disk1.vmdk & cloudera-quickstart-vm-4.3.0-virtualbox.ovf).

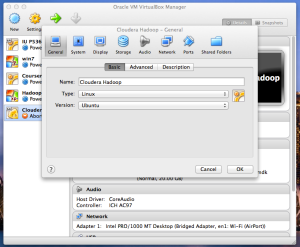
Step 4: Start the Virtual box and click on “New”. Enter the Name: Cloudera Hadoop. Select type as “Linux” and version as “Ubuntu”.

1

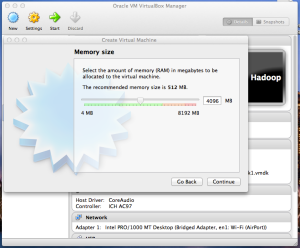
Step 5: Click on the systems tab. Set the Base memory to 4096 MB. You should set it as high as possible with minimum of 1024 MB. Click on continue.

2

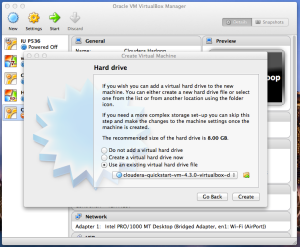
Step 6: In this step you need to select the training VM that you have downloaded. Select the option “Use an existing virtual hard drive”. Navigate to the unarchived folder and select the file with .vmdk extension. And click on done button.

3

Step 7: You can now double click on “Cloudera Hadoop” in the left panel to start using the Training virtual machine.

From now onwards, all the tutorials on this blog will be using the demo VM. In the next post we will learn basic HDFS commands so that we can gear up toward writing our first MapReduce program.

Install Hadoop in Pseudo Distributed mode

Installing Hadoop in pseudo distributed mode lets you mimic multi server cluster on a single machine. Unlike standalone mode, this mode has all the daemons running. Also the data in pseudo distributed mode is stored in HDFS rather than the local hard disk.

If you have followed the last post, the first three steps of this tutorial are the same.

  1. Create Hadoop user
  2. Install Java
  3. Download and unpack Hadoop
  4. Configure SSH
  5. Configure Hadoop
  6. Format Hadoop NameNode
  7. Start Hadoop
  8. Test Hadoop installation

Create Hadoop User

It is recommended to create a dedicated Hadoop user account to separate the Hadoop installation from other services running on the same machine.

Open System Preference > Users & Groups

Click the ‘+’ button at the bottom of the small window with the list of already existing users. You may need to click on the lock image and enter the administrator name and password. After entering the admin name and password correctly, click on the ‘+’ button and enter the following:-

Full Name: hadoop
Account Name: hadoop

Also set the password for the account. Click on “Create User”. You can now login to the hadoop account to install Hadoop.

Install Java

If you running Mac OS, then you will already have Java installed on your system. But just to make sure, open the terminal and enter the following command.

$:~ java -version
java version "1.6.0_37"
Java(TM) SE Runtime Environment (build 1.6.0_37-b06-434-11M3909)
Java HotSpot(TM) 64-Bit Server VM (build 20.12-b01-434, mixed mode)

By doing so, you will see the version of Java installed on your system (1.6.0_37 in this case). Java 6 or later is required to run Hadoop. If your version number suggest otherwise, please download the latest JDK.

Download and unpack Hadoop

Download Hadoop from the Hadoop release pages (http://hadoop.apache.org/releases.html). Make sure to download the latest stable version of Hadoop (hadoop-1.2.1.tar.gz as of this post). Save the file in /Users/hadoop (or any other location of your choice).

Unpack the file using the following command:-

$:~ tar -xzvf hadoop-1.2.1.tar.gz

Set the owner of the extracted hadoop files to be the hadoop user and group.

$:~ chown -R hadoop hadoop-1.2.1

Configure SSH

SSH (secure shell) allows two networked devices to exchange data using a secure channel. As Pseudo Distributed mode mimics multi server cluster, Hadoop control scripts need SSH to perform cluster wide operations. For example, there is a script start-all.sh to start all the daemons running in the cluster.

To work seamlessly with SSH, we need to setup password-less for hadoop user for machines on the cluster. Since we are in Pseudo distributed mode, we therefore need to setup password-less login to localhost.

To do this, we need to generate public/private key pair and place it in the NFS location that is shared across the cluster.

First generate the key pair by typing the following command in the hadoop user account:

$:~ ssh-keygen -t rsa -f ~/.ssh/id_rsa

This will generate the key pair. It will store the private key in ~/.ssh/id_rsa and the public key will be stored in ~/.ssh/id_rsa.pub.

Now we would like to share the public key will all the machines on the cluster. To do this, we need to make sure that the public key is stored in ~/.ssh/authorized_keys file on all the machines in the cluster that we want to connect to.

To do that, type the following command:

$:~ cat ~/.ssh/id_rsa.pub >> ~/.ssh/authorized_keys

You can now test the password-less ssh login by the following command:

$:~ ssh localhost
$:~ Last login: Mon Aug 19 10:49:42 2013

Configure Hadoop

The Hadoop configuration is more elaborate in comparison to the one in standalone mode as we need to configure the daemons.

Before we go any further, let us understand the different Hadoop configuration files and their usage. These files are stored in $Hadoop_HOME/conf folder.

  1. hadoop-env.sh – Environment variables that are stored in the scripts to run hadoop.
  2. core-site.xml – Configuration settings for Hadoop core, common to HDFS and Mapreduce.
  3. hdfs-site.xml – Configuration settings for HDFS daemons.
  4. mapred-site.xml – Configuration settings for MapReduce daemons.

To start off, we will first of all set the Java Home path so that Hadoop can find the version of Java you want to use. To do this, enter the following in hadoop-env.sh:

export JAVA_HOME=/Library/Java/Home

Set the property fs.default.name, which specifies the location where HDFS resides. We do this by adding the following in core-site.xml under configuration tags:

<property>
   <name>fs.default.name</name>
   <value>http://localhost:9000</value>
</property>

Set the property dfs.replication, which tell HDFS how many copies to make of a block. To do this by adding the following in hdfs-site.xml:

<property>
   <name>dfs.replication</name>
   <value>1</value>
</property>

Set the property mapred.job.tracker, which gives the location where the JobTracker runs. To do this add the following lines in mapred-site.xml.

<property>
   <name>mapred.job.tracker</name>
   <value>http://localhost:9001</value>
</property>

Format Hadoop NameNode

The first step is to format the Hadoop filesystem that is implemented on top of HDFS. You need to do this for the first time you setup hadoop installation.

You can do this by typing the following command:

$:~ hadoop-1.2.1/bin/hadoop namenode -format

You will get an output similar to the following:

13/08/19 12:08:34 INFO namenode.NameNode: STARTUP_MSG:
/************************************************************
STARTUP_MSG: Starting NameNode
STARTUP_MSG: host = Prashants-MacBook-Pro.local/***.***.*.**
STARTUP_MSG: args = [-format]
STARTUP_MSG: version = 1.1.2
STARTUP_MSG: build = https://svn.apache.org/repos/asf/hadoop/common/branches/branch-1.1 -r 1440782; compiled by 'hortonfo' on Thu Jan 31 02:03:24 UTC 2013
************************************************************/
13/08/19 12:08:40 INFO util.GSet: VM type       = 64-bit
13/08/19 12:08:40 INFO util.GSet: 2% max memory = 39.83375 MB
13/08/19 12:08:40 INFO util.GSet: capacity      = 2^22 = 4194304 entries
13/08/19 12:08:40 INFO util.GSet: recommended=4194304, actual=4194304
13/08/19 12:08:41 INFO namenode.FSNamesystem: fsOwner=hadoop
13/08/19 12:08:41 INFO namenode.FSNamesystem: supergroup=supergroup
13/08/19 12:08:41 INFO namenode.FSNamesystem: isPermissionEnabled=true
13/08/19 12:08:41 INFO namenode.FSNamesystem: dfs.block.invalidate.limit=100
13/08/19 12:08:41 INFO namenode.FSNamesystem: isAccessTokenEnabled=false accessKeyUpdateInterval=0 min(s), accessTokenLifetime=0 min(s)
13/08/19 12:08:41 INFO namenode.NameNode: Caching file names occuring more than 10 times
13/08/19 12:08:41 INFO common.Storage: Image file of size 112 saved in 0 seconds.
13/08/19 12:08:41 INFO namenode.FSEditLog: closing edit log: position=4, editlog=/tmp/hadoop-hadoop/dfs/name/current/edits
13/08/19 12:08:41 INFO namenode.FSEditLog: close success: truncate to 4, editlog=/tmp/hadoop-hadoop/dfs/name/current/edits
13/08/19 12:08:41 INFO common.Storage: Storage directory /tmp/hadoop-hadoop/dfs/name has been successfully formatted.
13/08/19 12:08:41 INFO namenode.NameNode: SHUTDOWN_MSG:
/************************************************************
SHUTDOWN_MSG: Shutting down NameNode at ******-MacBook-Pro.local/***.***.*.**
************************************************************/

Start Hadoop

Start Hadoop essential means running all the Hadoop daemons. To do this, we execute the following command:

$:~ hadoop-1.2.1/bin/start-all.sh
starting namenode, logging to /Users/hadoop/hadoop-1.1.2/libexec/../logs/hadoop-hadoop-namenode-Prashants-MacBook-Pro.local.out
localhost: starting datanode, logging to /Users/hadoop/hadoop-1.1.2/libexec/../logs/hadoop-hadoop-datanode-Prashants-MacBook-Pro.local.out
localhost: starting secondarynamenode, logging to /Users/hadoop/hadoop-1.1.2/libexec/../logs/hadoop-hadoop-secondarynamenode-Prashants-MacBook-Pro.local.out
starting jobtracker, logging to /Users/hadoop/hadoop-1.1.2/libexec/../logs/hadoop-hadoop-jobtracker-Prashants-MacBook-Pro.local.out
localhost: starting tasktracker, logging to /Users/hadoop/hadoop-1.1.2/libexec/../logs/hadoop-hadoop-tasktracker-Prashants-MacBook-Pro.local.out

Test Hadoop installation

To test the hadoop installation execute the following command:

$:~ hadoop-1.1.2/bin/hadoop jar hadoop-1.1.2/hadoop-examples-1.1.2.jar pi 10 100

This concludes Hadoop installation in Pseudo Distributed mode. However if you are beginner like me I strongly suggest that you install Cloudera Hadoop Demo Virtual Machine with Virtual Box. Please follow the next post to see how it can done.


References

1. Hadoop – The Definitive Guide (Tom White)
2. http://wiki.apache.org/hadoop/Running_Hadoop_On_OS_X_10.5_64-bit_(Single-Node_Cluster)

Install Hadoop in Standalone mode

We discussed in the last post, the different modes in which Hadoop can be run. Depending upon what kind of user you are and what you want to do with Hadoop, you can decide the mode in which you run Hadoop.

You will want to run Hadoop in Standalone mode when you want to test and debug Hadoop programs with small input files that are stored locally (not in HDFS).

Hadoop installation is pretty easy and you will find tons of links online giving the instruction of doing it. But to maintain continuity on the blog, I have decided to write this post.

Please note that this installation tutorial is based on Mac OS. Similar tutorials can be found for users using different OS.

Steps involved in the installation :-

  1. Create Hadoop User
  2. Install Java
  3. Download & unpack Hadoop
  4. Configure Hadoop
  5. Test the Hadoop installation

Create Hadoop User

It is recommended to create a dedicated Hadoop user account to separate the Hadoop installation from other services running on the same machine.

Open System Preference > Users & Groups

Click the ‘+’ button at the bottom of the small window with the list of already existing users. You may need to click on the lock image and enter the administrator name and password. After entering the admin name and password correctly, click on the ‘+’ button and enter the following:-

Full Name: hadoop
Account Name: hadoop

Also set the password for the account. Click on “Create User”. You can now login to the hadoop account to install Hadoop.

Install Java

If you running Mac OS, then you will already have Java installed on your system. But just to make sure, open the terminal and enter the following command.

$:~ java -version
java version "1.6.0_37"
Java(TM) SE Runtime Environment (build 1.6.0_37-b06-434-11M3909)
Java HotSpot(TM) 64-Bit Server VM (build 20.12-b01-434, mixed mode)

By doing so, you will see the version of Java installed on your system (1.6.0_37 in this case). Java 6 or later is required to run Hadoop. If your version number suggest otherwise, please download the latest JDK.

Download and unpack Hadoop

Download Hadoop from the Hadoop release pages (http://hadoop.apache.org/releases.html). Make sure to download the latest stable version of Hadoop (hadoop-1.2.1.tar.gz as of this post). Save the file in /Users/hadoop (or any other location of your choice).

Unpack the file using the following command:-

$:~ tar -xzvf hadoop-1.2.1.tar.gz

Set the owner of the extracted hadoop files to be the hadoop user and group.

$:~ chown -R hadoop hadoop-1.2.1

Configure Hadoop

The only configuration required to configure for standalone installation is to set JAVA_HOME environmental variable. This variable lets Hadoop know the location of Java that you want to use.

To set this, open the hadoop-env.sh file located in conf folder under HADOOP_HOME (hadoop-1.2.1).

Open Users > hadoop > hadoop-1.2.1 > conf > hadoop-env.sh

Add set the location of your Java installation, by adding the following line.

export JAVA_HOME=/Library/Java/Home

Test the Hadoop installation

To test the installation run one of the Hadoop example that come along with the source.

First create an directory and name it “input”. Copy all the files from conf dir to newly create “input” folder.

$:~ mkdir input
$:~ cp hadoop-1.2.1/conf/*.xml input

Now you can run the program using the command,

$:~ bin/hadoop jar hadoop-examples-*.jar grep input output 'dfs[a-z.]+'

If everything is setup properly, you will see the an ouput similar to,

18/09/13 20:47:24 INFO mapred.FileInputFormat: Total input paths to process : 1
18/08/13 20:47:24 INFO mapred.JobClient: Running job: job_200809111608_0033
18/08/13 20:47:25 INFO mapred.JobClient:  map 0% reduce 0%
18/08/13 20:47:38 INFO mapred.JobClient:  map 13% reduce 0%
18/08/13 20:47:39 INFO mapred.JobClient:  map 16% reduce 0%
18/08/13 20:47:43 INFO mapred.JobClient:  map 22% reduce 0%
18/08/13 20:47:44 INFO mapred.JobClient:  map 24% reduce 0%
18/08/13 20:47:48 INFO mapred.JobClient:  map 33% reduce 0%
18/08/13 20:47:53 INFO mapred.JobClient:  map 41% reduce 0%
18/08/13 20:47:54 INFO mapred.JobClient:  map 44% reduce 0%
...

In the next post we will see how to install Hadoop in pseudo distributed mode.


Reference

1. Hadoop – The Definitive Guide (Tom White)
2. http://wiki.apache.org/hadoop/Running_Hadoop_On_OS_X_10.5_64-bit_(Single-Node_Cluster)

Hadoop Modes – Standalone, Pseudo Distributed & Fully Distributed

After going through the fundamentals of Hadoop, HDFS & MapReduce, its time we move on to install Hadoop on your system. Before the actual installation, it is important to understand the modes in which Hadoop can be run.

There are three modes in which Hadoop can be installed and run. They are:-

1. Standalone Mode
2. Pseudo Distributed Mode
3. Fully Distributed Mode

Standalone Mode

In this mode, there are no Hadoop Daemons (NameNode, DataNode, Secondary NameNode, JobTracker & TaskTracker) that are running in the background.

As a result you will,

  • Not have NameNode storing meta-data information.
  • Not have a DataNode, as there will be no HDFS. The file will be stored locally on the hard disk.
  • Not have a TaskTracker sending status reports the JobTracker.
  • Not have a JobTracker as there are no TaskTrackers to manage.

As the name suggests, everything in standalone mode runs in a single JVM (single machine). It is best suited when you want to test your program for bugs with small input (stored locally). It is also known as the LocalJobRunner mode.

Note – Only Standalone mode supports quick testing of incremental changes that you make to the code.

Pseudo Distributed Mode

This mode helps you mimic a multi-server installation on a single machine. Pseudo Distributed mode also runs on a single machine, but it has all the daemons running in a separate process. Also it will have the files stored on HDFS and not on the local machine. Thus in be seen as small scale implementation before you run on an actual cluster with 1000s of nodes.

Fully Distributed Mode

As the name suggests, this mode involves the code running on an actual Hadoop cluster. It is mode in which you see the actual power of Hadoop, when you run your code against a very large input on 1000s of servers.

It is always difficult to debug a MapReduce program as you have Mappers running on different machine with different piece of input. You can never know where the Mappers are going to run eventually. Also with large inputs, it is likely that the data will be irregular in its format.

Development Tip – So before you run your code on a real Hadoop cluster, following a few steps can make your life easy with MapReduce.

  1. Always Unit Test your code first.
  2. Start with a very small portion of the input.
  3. Test locally (in LocalJobRunner mode) with the small input.
  4. Test in Pseudo Distributed mode with daemons running (to view the performance of your code with the small input).
  5. Finally if you are satisfied with running you code and its performance, you are ready to run it in Fully Distributed Mode on a real cluster.

In the subsequent posts we will see how to install Hadoop in Standalone Mode, Pseudo Distributed Mode.


References

1. Hadoop – The Definitive Guide (Tom White)
Hadoop ≅ HDFS + MapReduce (Part – II)

In this post, we will discuss the following with regards to MapReduce framework :-

  1. Motivation for a parallel processing framework
  2. What is MapReduce?
  3. How MapReduce solves a problem?
  4. MapReduce in detail
    1. Map Phase
    2. Shuffle & Sort Phase
    3. Reduce Phase

Motivation for a parallel processing framework

As you know we are living in the age of Data. Today the size of internet is almost 40+ billion web pages.  If we assume that each page has 20Kb of data, we looking at somewhere close to 800+ terabyte of data. With the reading speed of 100 Mbps, it will take a computer more than 4 months to read the web. And just to store such huge data, we will need 1000’s of computers. 

Clearly we need a mechanism to divide such huge work among various computers. If we give the same work of reading 400+ terabytes of data to say 1000 computers, it can be done in less than 3 hours.

But our task is not limited to reading data. We need also need to process such massive data. Clearly consolidating the data from the nodes and transferring it to the compute nodes will take a lot of time. We therefore need a programming framework that allows for distributing the computation task and running them in parallel.

What is MapReduce?

MapReduce is one such programming model designed for processing large volumes of data in parallel by dividing the work into a set of independent tasks. Each of these tasks are then run on individual node in a cluster. The advantage of MapReduce framework is that, it not only divides the work but also also abstracts the programmer from all the issues that come with distributed computing such as communication and coordination, recovering from machine failure, status reporting, debugging, optimization and data locality.

How MapReduce solves a problem?

A typical problem solved by MapReduce can be broken down into the following steps :-

  1. Read a lot of data
  2. Extract something you are interested in from every record
  3. Shuffle and sort the intermediate results
  4. Aggregate (filter, sort or transform) the intermediate result
  5. Write out the result

MapReduce in detail

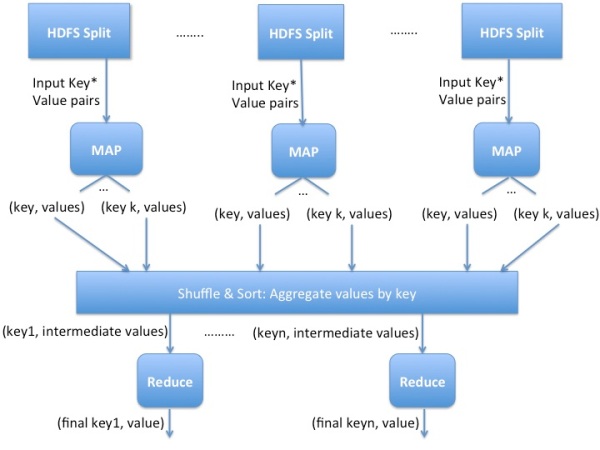
The figure below will give you an overview of MapReduce. In MapReduce everything is in terms of key-value pairs. The phases of the MapReduce task are Map, Sort & Shuffle and Reduce.

The two Daemons associated with MapReduce are JobTracker and TaskTracker. The Client submits the job to the master node which runs the JobTracker. The JobTracker then assigns Map and Reduce tasks to other nodes in the cluster. These nodes run the TaskTracker daemons that starts the Map and Reduce tasks on the nodes and send the progress report to the JobTracker. So basically JobTracker is the MasterNode and TaskTrackers are the slaves.

Overview of MapReduce

Overview of MapReduce

Map Phase

One of the major advantages of using Hadoop is Data Locality. Hadoop always tries to take the computation to the data rather than to transfer data to the computation node. In other words a node is made the Mapper that is closest to the data (if possible the same node that has the data is made the mapper). This greatly reduces the network traffic and the time to transfer data from one node to another.

If you can see the figure above, multiple mappers run the Map tasks in parallel, each processing a portion if the input data. The Mappers receives the input interms of key-value pairs. It then emits a list of intermediate key and value pair (zero of more).

map(key, value) -> (intermediate_key, intermediate_value)

Map is essentially a function that takes a key-value pair as input and emits intermediate key-value pair. Let us concrete our understanding by taking an example of “word frequency” Mapper. Here our goal is to find the frequency of the words in a document. The key here is the offset of the word (where the word is found in the document) and the value is the word itself. When this is passed to the Mapper, it emits the word as key and 1 as the value.

For instance, let the document be “to be or not to be”.

So the Map function would look something like,

map(k, v) = (v, 1)

map(offest1, 'to') = ('to', 1)

map(offest2, 'be') = ('be', 1) 

map(offest3, 'or') = ('or', 1)

map(offest4, 'not') = ('not', 1)

map(offest5, 'to') = ('to', 1)

map(offest6, 'be') = ('be', 1)

Sort & Shuffle phase

After all the Map phases are complete, every pair has an intermediate key and value. Now all the values that have the same key are combined together and then they are sorted. This is the sort and shuffle phase of MapReduce. It is important to note that the output of the Map phase is stored on the local hard disk and not on the HDFS.

Continuing with our example, the output after Sort & Shuffle phase will be,

('to', [1, 1]), ('be', [1, 1]), ('or', [1]), ('not', [1])

Reduce Phase

After the Sort & Shuffle phase, the intermediate lists of key-value pair is fed to the Reducer, where it is subjected to the Reduce function. The Reducer emits zero/more final key value pair. Usually, a reducer will emit one key value pair for every intermediate key. The output of the Reducer is written on to the HDFS.

The Reduce function here will be to add all the intermediate values associated with a particular key. So the final output will be,

('to', 2), ('be', 2), ('or', 1)

As you see, the Reducer will give us the required output (which is the word frequency in the document).

To conclude, I reiterate that MapReduce is a great abstraction that allows programmers to focus only on the problem rather that all the messy details that need to be looked into while programming for large scale distributed development.


References

1. http://developer.yahoo.com/hadoop/tutorial/module4.html
2. Hadoop – The Definitive Guide (Tom White)